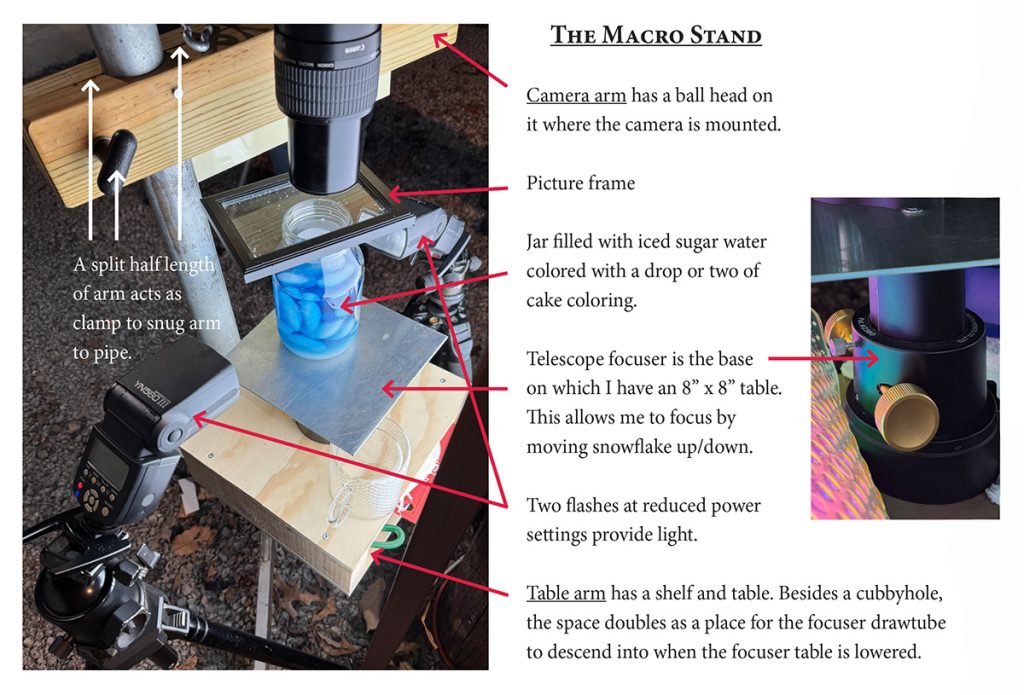
No sooner had the February magazine gone to the printer than we had snow again, probably that very night. One of my goals after last month’s lesson was to do more to vary the background. With fresh snow coming down, here was my chance to try again.
Earlier in the day I had done one other thing in preparation for this moment. I bought several 4” x 5” photo frames with glass, for $1.49 each.
Steven Smith’s snowflake photos that we saw last month, centered around him collecting flakes on glass and shooting them right on the glass. If I could get that to work for me, it would eliminate the paintbrush.
“If I could get that to work for me” might sound strange if you have never tried this, and might get underscored, if you have.
I held a frame in the falling snow, and soon the glass was peppered with flakes. Would I catch a gem? I studied the flakes…nothing good.
I wiped the glass with a duster and caught more flakes. Adrian had another frame and he, too, was catching flakes. When one of us found one we wished to photograph, we carried the frame to the macro stand that we described last month.
This time we put the glass frame over a blue background on the focuser stand. I’ll tell you what the background was, in time, but for now I want you to guess.
Where in the world is that flake? I was half muttering to myself, and half thinking out loud.
With high magnification, unless the flake was at the perfect spot, it wasn’t. Back and forth I slid the frame—was it this one? No…there it is! Hopefully it isn’t melting after all the delay finding it.
Rime! Not as good as I had hoped. Time to let Adrian photograph his flake while I look for another one.

A duster brush made sweeping the glass clean easy…well…sort of. Moisture soon smeared the surface and then froze tight. Oh well…
“I’ve got another one for when you are finished,” I told Adrian.
Back and forth, like this, we worked. Also, Bethany would study flakes on the black collection board. Sometimes she found one that we would transfer from the collection board to a picture frame using a tiny artist’s paintbrush.
Ten o’clock…ten-thirty…eleven o’clock…some were getting tired. Off to find warm beds they went. But I wasn’t done. Sometimes the best flakes are the last ones coming down when the storm has become a flurry. I was not quitting, at least not yet.
Eleven-thirty…midnight…was I starting to see a change? Some flakes had clean portions on the crystal while rime covered other portions. That was an improvement over the rime-covered crystals we had been experiencing for the majority of the evening.
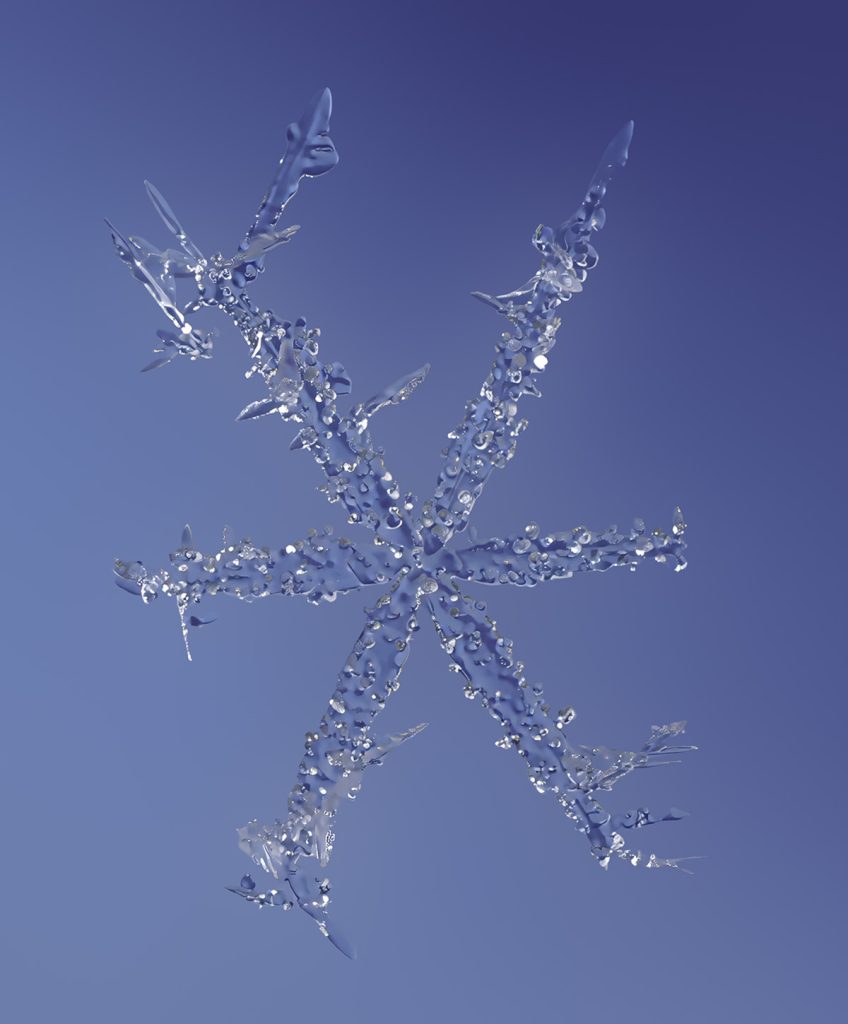
See the January 2024 lesson to learn how to focus-stack so all the points are in sharp focus. Photo © Kevin Shank.
Twelve-thirty…the flakes were definitely cleaner now. Too bad Adrian and Bethany weren’t here to enjoy this with me.
I collected another and took it to the camera. RIME! I turned to catch another flake…nothing…nothing was coming down! Not even a flurry.
I glanced at my watch—a quarter till one.
I’m done, I thought. Off with the camera. Off with the flashes. Off with the light panel. Off with the garage lights.
Not wanting to have the equipment sweat in a warm house, I placed the gear inside a vehicle before I went inside.

But not bedtime for me, just yet—I was too wide awake. I wanted to see a few of the flakes processed. How would the iced, blue-colored sugar-water background look?
Some of you may have read about that a number of years ago. This is the second time I have tried that for a background. I believe I like it better than trying to capture iridescence with the shower mat. I simply put water into a jar, a drop of blue coloring, sugar to slow down it freezing, and ice cubes to vary the shade of color.
Several of my takeaways from this effort were, for one, the glass picture frames did not stay as clean as I would like. Water froze all over their surfaces.
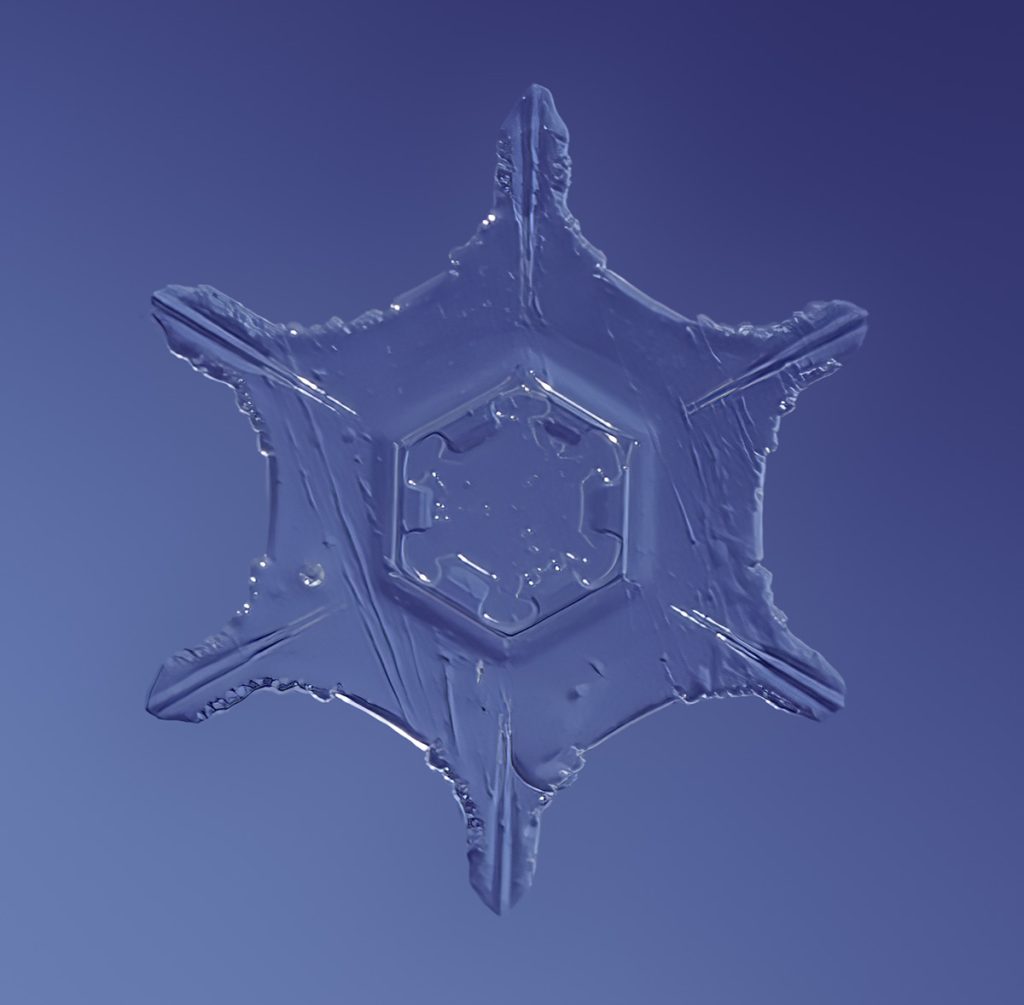
Had this snowflake been photographed on the tip of a paintbrush (like taught last month), or on fabric hairs such as a black mitten (like Don Komarechka uses), it may not have melted, or at least not as quickly. Photo © Kevin Shank.
Secondly, finding snowflakes in the camera’s view was just too hard for efficiency. What could we do?
My plan for the next effort is to keep the small picture frames clean. Inspect snowflakes on the dark Plexiglas sheet; then use a small paintbrush to transfer flakes to a clean picture frame, one-by-one.
Beyond that, we plan to make a mask from a jar lid to place around the snowflake—perhaps from a peanut butter lid. The lid will be cut into a strip of plastic that has a ¾” hole in it. When this is placed around the flake, we should be able to quickly locate the flake in the camera’s view. By leaving a piece of the lip of the lid on the mask, we will have a handy handle for picking up the mask.
Maybe we will make several of these masks in different colors. Those of us photographing could each claim a color. Later, when we are sorting out who shot what, we will easily know because of the color coding.
Another way we may do this, and perhaps more likely, is to use a color-coded plastic arrow pointing to the flake, and then set the mask over that.
In any case, you have plenty of ideas to build on. When you get your photos, we will delight in both seeing them, and hearing how you made it happen.