The ladder rattled under my weight as I made my way up to the eaves of an old farmhouse, camera in tow. I had already positioned a C-clamp on the ladder about 20 feet (6 m) above the ground, 3 feet (1 m) away from “the hole” behind the rain gutter. I was preparing to photograph bats in flight as they exited their roost in the eaves.
Photographing bats in flight had interested me for twenty-plus years, but I assumed only the “big name” nature photographers could take photos like that. I remember thinking it would be nice to capture a photo of a bat catching a mosquito, but I had not even photographed a bat in flight. I had soon dismissed the thought as “impossible,” without the faintest trace of a notion that I might actually do this a few months later—well, almost.
I hadn’t realized how easy photographing bats in flight could be…even with mosquitos. Granted, a few special tools are necessary, but getting these photos is much easier than I had thought, and than you may think. Just last night, over the course of one hour, bats triggered my camera 144 times.
Let’s begin with the toughest part first. You need to find a place where bats are roosting—not only roosting, but a place where their exit/entrance is somewhat controlled. The mouth of a cave will not work well, while a hole in a wall may work very well. If you do not know of a place like this, hang up a bat house. You may be able to attract bats to your yard in that way. They will pay you back with pest control and some photo opportunities.
Once you find a bat roosting site or bats begin using your bat house, you have conquered the most difficult challenge. All that is needed after this are a few pieces of equipment and a little knowledge.
I opened the quick-release lever on the ball head that was secured to my C-clamp and carefully locked the camera into place. Did you catch what I just did? There is no extra charge for this tip, so get it. I have a C-clamp on which is welded a bolt and a base plate onto which I have screwed a ball head like those intended for a camera tripod. This gives me a solid camera support anywhere I can clamp a C-clamp. Serious nature photographers will appreciate this flexibility since it can be used many places a tripod cannot.
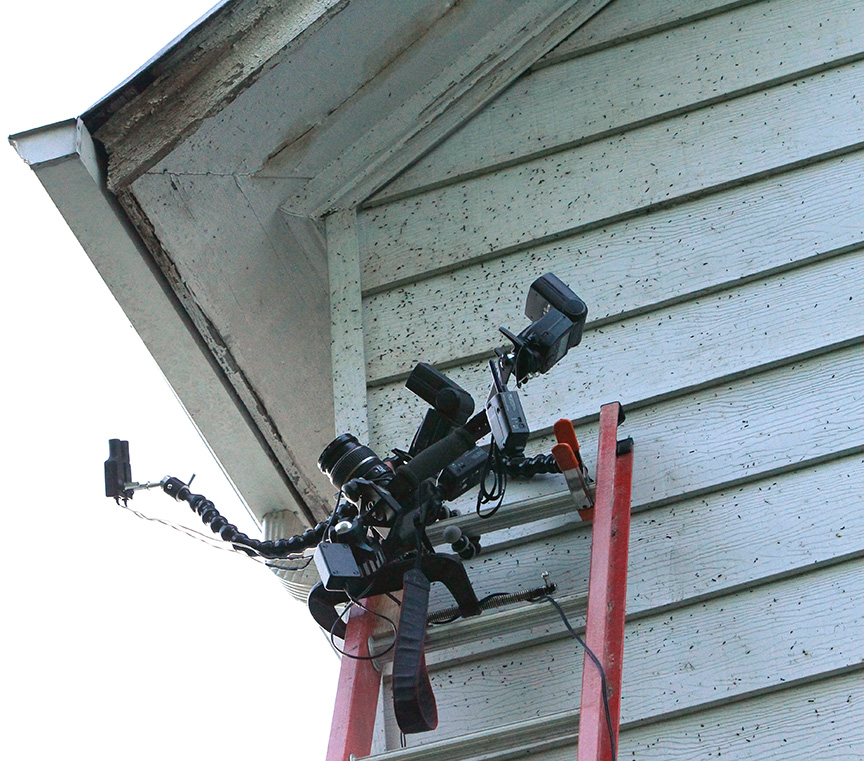
The infrared sensors for my Phototrap trigger were placed below the hole from which I was told the bats would exit. I placed several flashes off camera and reduced the power setting to 1/16 power. This reduced setting sped up the duration of the flash from about 1/1000 second to about 1/8000 second. This quick burst of light would freeze the movement of the bats.
With the camera, flashes, and Phototrap turned on, I tested the set-up by swinging a broom through the area where a bat would pass. By reviewing the bristles of the broom for sharpness, I could establish/confirm sharp focus.
As twilight settled across the landscape and headed for dark, we sat in lawn chairs to watch the action unfold. We began to hear a lot of squeaking near the opening in the siding—the parade was about to begin. Soon a bat zipped out, and a miniature “lightning” flash popped at the end of the ladder—and then another, and another.
After a handful of shots, I climbed the ladder to confirm that the photos were sharp and the trigger and camera were aimed at the right spot. Shooting digitally instead of with film certainly has advantages for quickly reviewing results.
Reclining in the comfy yard chair my friends offered me, I continued to watch the bats and flashes. Fifty shots…eighty shots…this was almost too easy.
As I reviewed the photos on the back of my camera, I could hardly believe my eyes. Once home, I eagerly downloaded the photos and looked at them on the computer. There they were—lots of them. Mosquitoes! Apparently there was moisture in the guttering that attracted them. As the bats exited the house, the photos captured not only the bats, but mosquitoes, a caddisfly, and even a spider swinging by on a strand of silk!
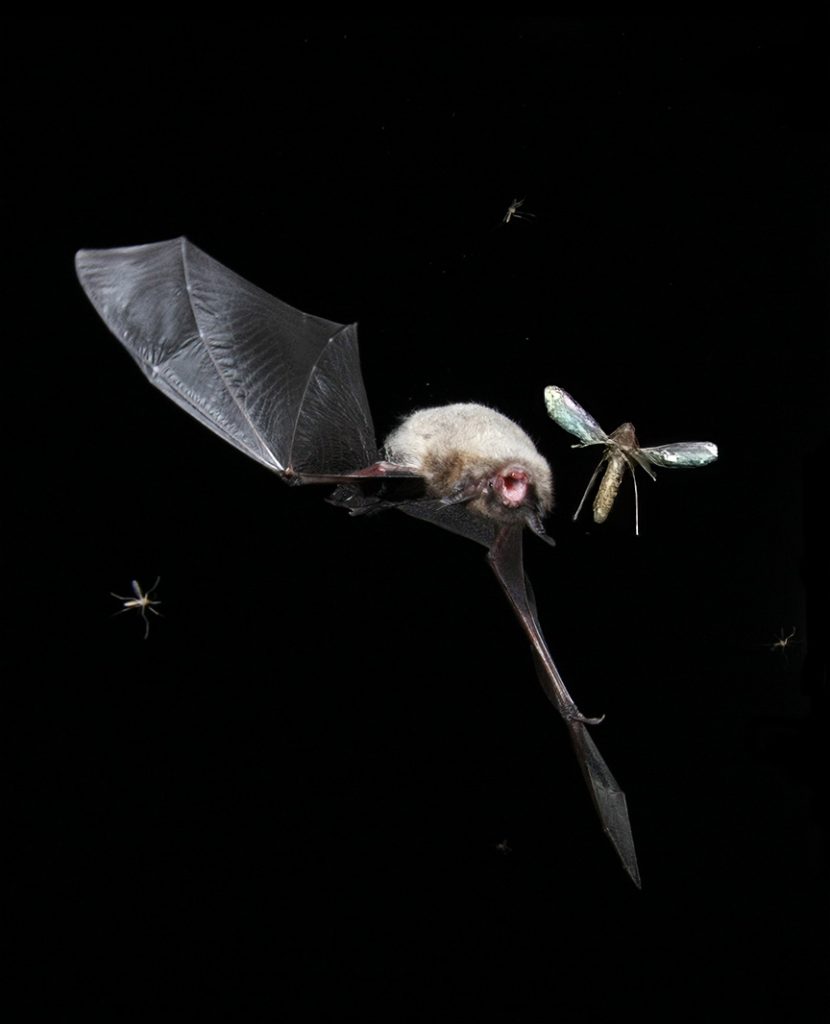
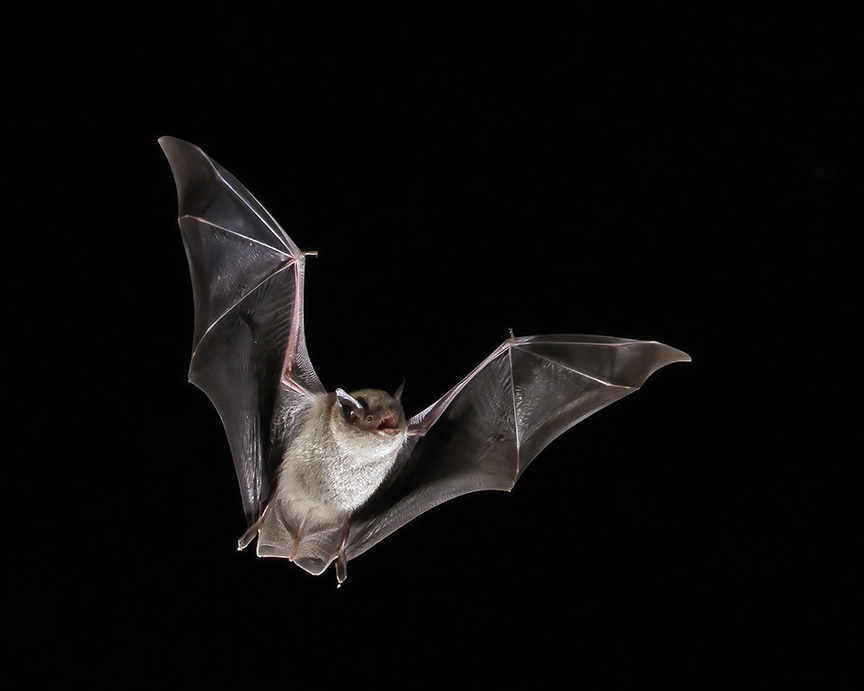

I could not resist looking through all the photos and copying the insects to place them on one bat photo as a composite to illustrate a bat flying through a “cloud” of mosquitoes. While I “helped” the bats to catch mosquitoes by positioning mosquitoes where I wish they had been, I only used mosquitoes that were photographed with a bat. This is why I previously said “almost” concerning a photograph of a bat catching a mosquito.
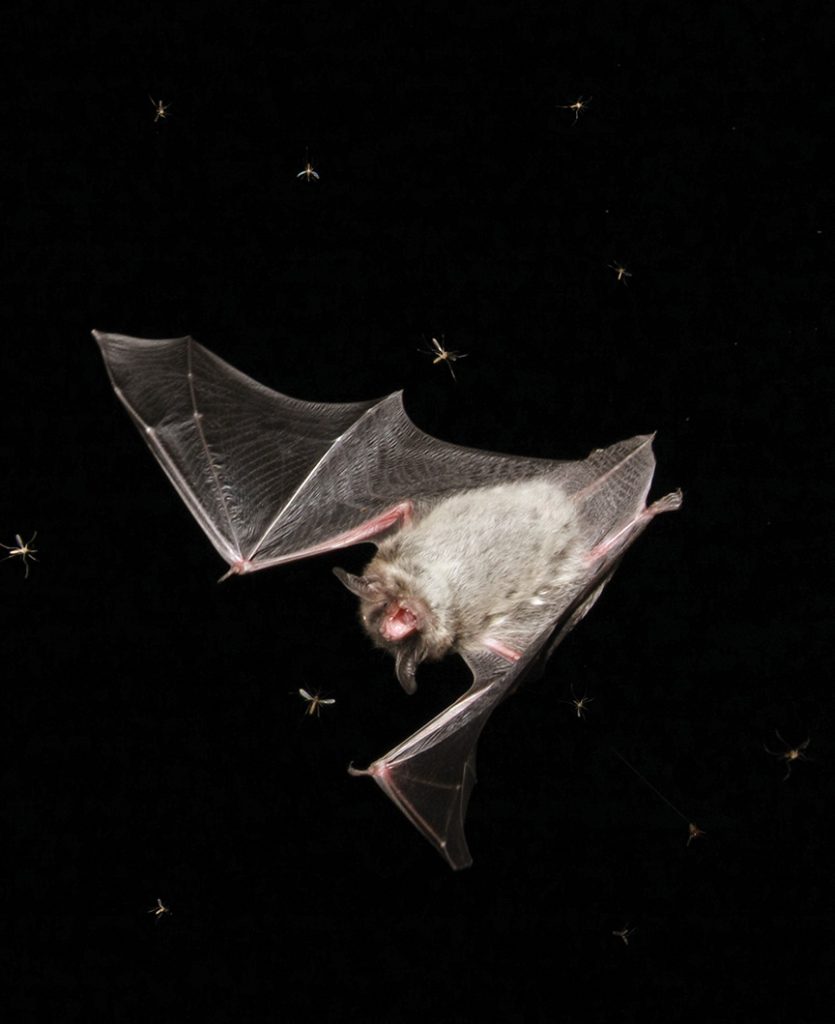
Well, one thing leads to another. The above story was first written for the June 2010 photography lesson. Recently when planning the “Mammal-ling With Friends” contest, I wondered what all mammals folks might be able to find for their lists. Would they think about bats? After all, bats are mammals.
To plant the “seed” to remember them, I chose to show a bat as an illustration with the contest announcement.
To take my thoughts one click farther, it occurred to me that we have not shared how to photograph bats in flight for a very long time. Checking back, I learned it has been ten years since we last taught this. So, now we should have a whole new class of bat-photographers-in-the-making reading this, shouldn’t we?
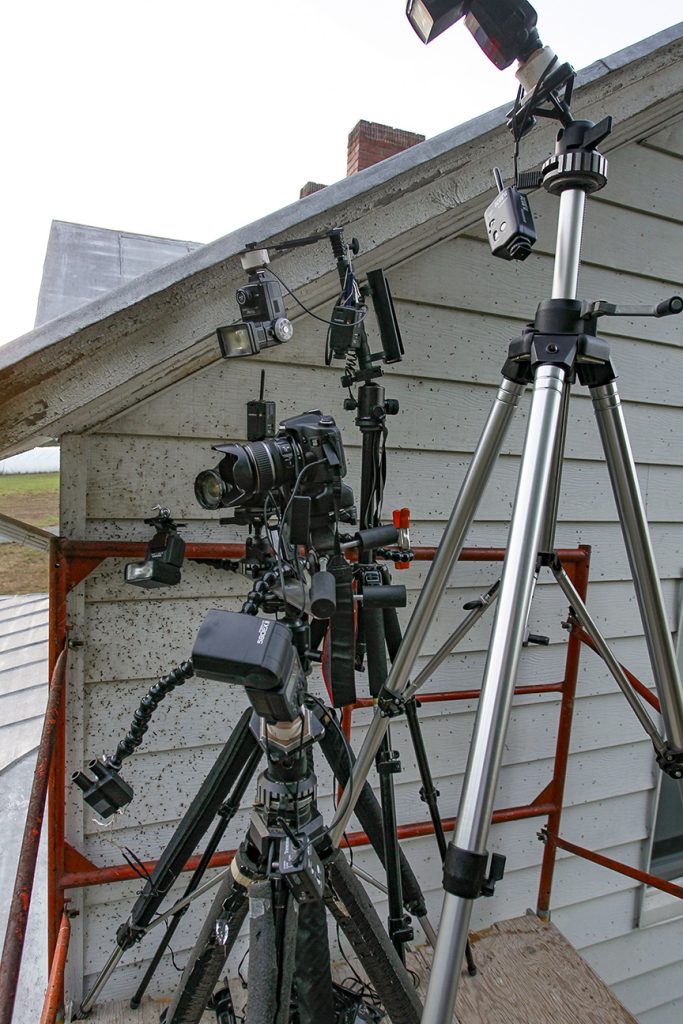
Shortly after that first night in 2010, the ladder was replaced with five sections of scaffolding. On the scaffolding, we set up two cameras and four flashes. In this way we could capture more angles, or a second photographer could have his camera set up at the same time.
The scaffolding was a significant improvement. We could easily set up multiple tripods 25 feet (8 m) above the ground.