

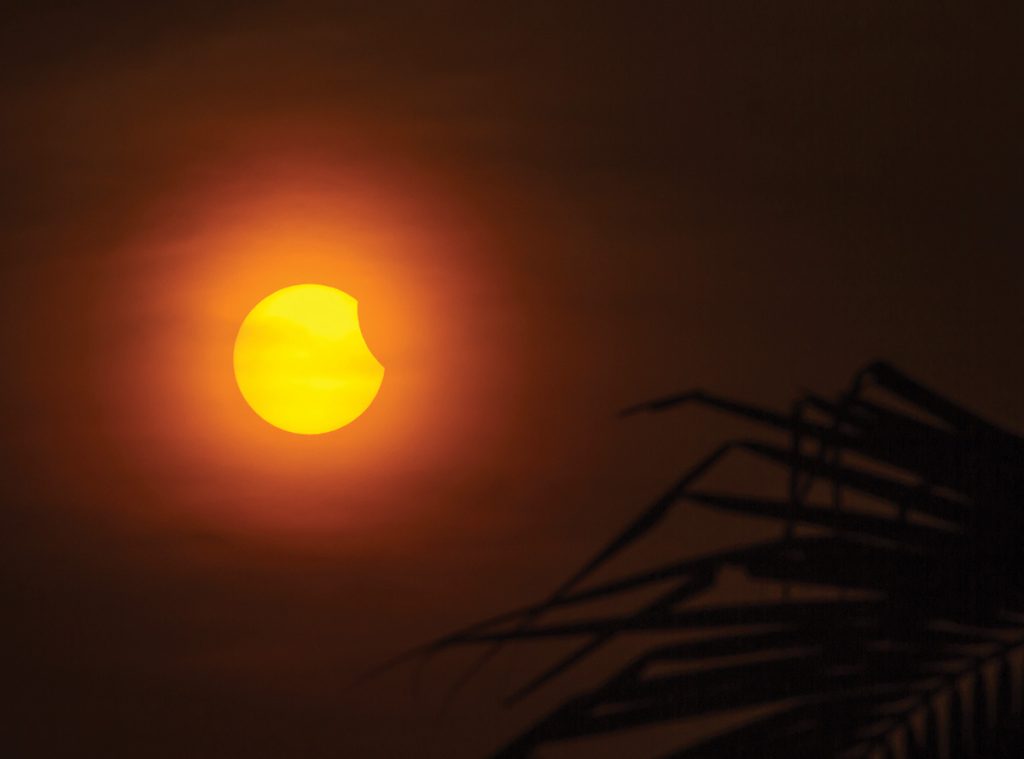
I visualize several groups of solar eclipse observers. One group makes no effort to photograph it. They simply enjoy the view without the distraction of fiddling with camera gear. A second group wants to grab a few shots just to prove they were there…kind of like me as a boy, using a Kodak Instamatic camera to photograph a deer a hundred yards away. A third group gets a little more serious. They pull out a long telephoto lens, a sturdy tripod, a DSLR camera body, a solar filter, a cable release, and a comfortable chair.… Chair? Where is my chair? Don’t tell me we forgot to pack the chairs?!!!
A fourth group might take photography to yet a deeper level. As we sit back and watch, we see a sturdy tripod emerge from a cargo trailer. Next, a camera on a long telephoto lens is attached to the tripod. A solar filter is securely attached to the lens. Next out of the trailer comes an equatorial mount, and then another. A second camera with a long lens emerges, and we watch it get secured to one of the equatorial mounts. Our fascination increases when a solar telescope is plopped onto the last mount. To it is attached a dedicated solar camera.
Out comes more gear…boat batteries, a table, a notebook computer, sunglasses, spotting scope complete with solar filter…the gadgetry doesn’t stop. Binoculars with solar filtration, chairs, a blanket-type shade that is black on the inside and white on the outside…later we discover it is used to cover the photographer and his computer so he can better see the screen as he achieves sharp focus with the camera and evaluates the exposures.
We resist the urge to interrupt him while he works feverishly setting up his stuff, or do we? Curiosity brims and is about to leak out. Do you suppose he would mind if we ask him to explain what he is doing?
And then there is a fifth group—photographers who are serious about their photography…!
WARNING: It is paramount that all optics pointed toward the sun—camera lenses, binoculars, spotting scopes, and telescopes, be protected with quality, securely-mounted solar filtration. If you cannot do this, skip the optics altogether. Caution children, and watch them too. A non-thinking child might tip a binocular toward the sun with disastrous results. My advice is to only have solar-filter-protected optics out and about.
Point-and-shoot cameras are typically pointless for shooting the sun. If you use them to photograph the crowd, turn off the flash. Better yet, put black electrical tape over the flash in case “auto” gets reactivated accidently. Everyone is trying to preserve night vision for maximum benefit when totality occurs, and a careless camera flash can ruin night vision for twenty minutes, times all the folks in the crowd who were affected by the flash. Furthermore, I don’t know how you could put a solar filter on most point-and-shoot cameras that would be of a quality I would feel comfortable pointing at the sun. Think SAFETY, SAFETY, SAFETY.
If you wish to photograph the eclipse, expect to use a telephoto lens of at least 300mm, with 600mm better yet. One exception to this would be if you are trying to include land formations in the foreground, and are intentionally shooting with the sun as a small component.
You will need a sturdy tripod. Many/most solar eclipses are associated with wind. High magnification on a flimsy tripod affected by the wind will quickly become useless, or nearly so. Due to the fast shutter speeds used to photograph the partial eclipse, some camera shake might be overcome during the pre/post totality photos. However, quality photography always requires paying attention to the details, and a sturdy support is one.
You will need solar filtration for your lenses. Make sure the filtration is secure and will not accidently come off.
Be sure to load a fresh, fast-writing large memory card into your camera. Old cards that have seen a lot of use can become problematic. We learned this when we lost a lot of photos from a birding trip in Florida. Several of the cards crashed, and we could not retrieve all the photos.
Set your focus to manual. One way to focus at infinity is to focus on a very distant land object. You can take a test photo and enlarge it on the screen to see how sharp it appears. When focus is achieved, lock the focus or apply a little tape to the focus ring so nothing changes.
Use manual exposure settings. Set the lowest ISO setting your camera will allow—hopefully that is ISO 100. This reduces sensitivity, which in turn reduces noise in the dark areas of your photo. Use an f/stop in the range of f/8-f/16, but not an aperture smaller than f/16. Doing so can cause diffraction which will give softer focus to the details.
During totality, and ONLY during totality, remove filter from camera lens for the photography. It must be back on when the sun reappears. DON’T GET DISTRACTED AND FORGET.
Shoot in RAW format. Post-processing programs will require RAW files. As always, be sure to use the highest quality file size your camera is capable of shooting.
Shoot all you can, and bracket exposures by changing the shutter speed from, say, 1/125 second through 1/8000 second. You will need to combine photos in post-processing to achieve quality across the dynamic range of black to super-bright light. Using software on a notebook computer to fire your camera can have a lot of advantages. We often use Backyard EOS to fire our cameras, and Lightroom, Nebulosity, and Photoshop for post-processing.
The way a solar system imaging camera works is to take photos by shooting short bursts of video. With video, individual shots are taken at the rate of 30, 60, or even more pictures per second, depending on the camera. In post-processing, software evaluates the individual frames, and only the sharpest ones are retained for stacking. In this way thousands of photos can be taken in a short period of time.
Some DSLR cameras let you shoot live video feed directly to a computer. Some models have an exposure-simulation mode. If yours does, use this mode to control the exposure by adjusting the shutter speed and the ISO.
Some DSLR cameras might not allow the capture of video signal, but do allow you to “live view” on a computer. You can use other software such as Backyard EOS to capture that video signal anyway. Programs like RegiStax will enable you to open the photos and stack them. For best results, you will need a 3.0 USB port, and a computer with a fast write speed.
Photographers who will get the best results are those who treat this as if they were shooting nighttime astrophotography, in that they will use a computer to fire the camera for hundreds of photos. Additionally, they will shoot bias, flat, and dark frames.
If you cannot use a computer to fire your camera, a wireless or electronic cable release would be a good accessory. With it you can fire the camera without introducing vibrations from touching it.
Change batteries for fresh ones twenty minutes before totality. You don’t want to have dead batteries during totality, or all your preparations might be totally wasted.
Plan to set up well before the beginning of the eclipse. If planning to use an equatorial mount, either polar-align it during the night prior, or know how to do daytime alignment. The Celestron mounts we sell have the option for tracking the sun in the solar system mode, and are easiest to align.
During the excitement of totality it may be hard to think clearly. So, have your camera adjustments memorized concerning your process for bracketing exposures. You should practice in advance until it is second nature to make the adjustments almost effortlessly.
Probably most of you reading this know we are dealers for Celestron, Sky-Watcher, Explore Scientific, and Meade telescopes and accessories. Besides the new equipment, occasionally we have used equipment become available. Right now is one of those times.
For one, we have a used CGEM DX tripod and mount (equatorial GoTo mount, used recently for the photo on page 14) for sale that can be purchased in combination with a C14 optical tube assembly. The tube is brand-new but has minor cosmetic blemishes. The tube is flawless optically, and it has a brand-new warranty. This is while supplies last only—first come is first served. This 14” Schmidt-Cassegrain system would be nearly $4000 below the cost of a brand new C14 on the CGX-L mount.
If you have interest in either the mount or the OTA but not the kit, we might sell them separately. Just give me a call.
We also have a Canon camera body that has been modified for astrophotography purposes. The H-alpha light can record on the photo, revealing fascinating colors and details that otherwise cannot be captured with stock 35 mm cameras.
I often hear from folks who are interested in purchasing a telescope but have no knowledge to draw from to help them in their decision-making. Here are several things to consider.
Do you want a telescope that helps you find the targets and tracks across the sky? These are often called GoTo telescopes, and they require power to operate them. Usually a 12-volt battery is used.
One advantage these telescopes have is that they speed up the learning curve. On your first night out after mastering the simple alignment procedure, you can look up dozens of targets. (My son once looked at 130 targets before going to bed at 3:00 a.m. He did this with a manual telescope, thanks to his knowledge of where the targets were. I cannot name that many targets, let alone find them. I would want the GoTo.)
Another beautiful application for a tracking telescope is when a larger crowd wishes to file past for half an hour, each taking a turn looking.
Manual telescopes are just that. You point them at what you want to look at. The learning curve is steeper, as you need guidance from somewhere to learn where to point the scope. Thankfully, Shaphan’s book, A Seasonal Guide to Exploring Our Skies can provide the needed guidance quite efficiently.
And one more tip, mirror diameter is important. We were told when we bought our first scope that if we do not buy at least a six-inch mirror, we will not enjoy the scope enough to get it out and use it. We bought an eight-inch telescope.
To explain this, astronomy is all about capturing really faint light in a low-light environment. The surface area of the mirror determines how well a given mirror will perform. Consider this:
3” mirror gathers 7 square inches of light. This is not enough light-gathering ability to enjoy using to view nebulas and galaxies.
6” mirror gathers 28 square inches, which is a four time increase over a 3” mirror. This is the minimum size we encourage someone to consider. A manual 6” can currently be purchased for less than $500.
8” mirror gathers 50 square inches, which is a 78% increase over a 6” mirror. To me, I’d consider this a minimum size rather than the 6”, but various astronomers I respect use 6” as the smallest they recommend.
10” gathers 78 square inches.
12” gathers 113 square inches.
14” gathers 154 square inches. This is the size of the OTA mentioned first on page 13.
16” gathers 200 square inches.
To discuss your interests/purchase a telescope, please give me a call. Kevin 1-540-947-1636.
