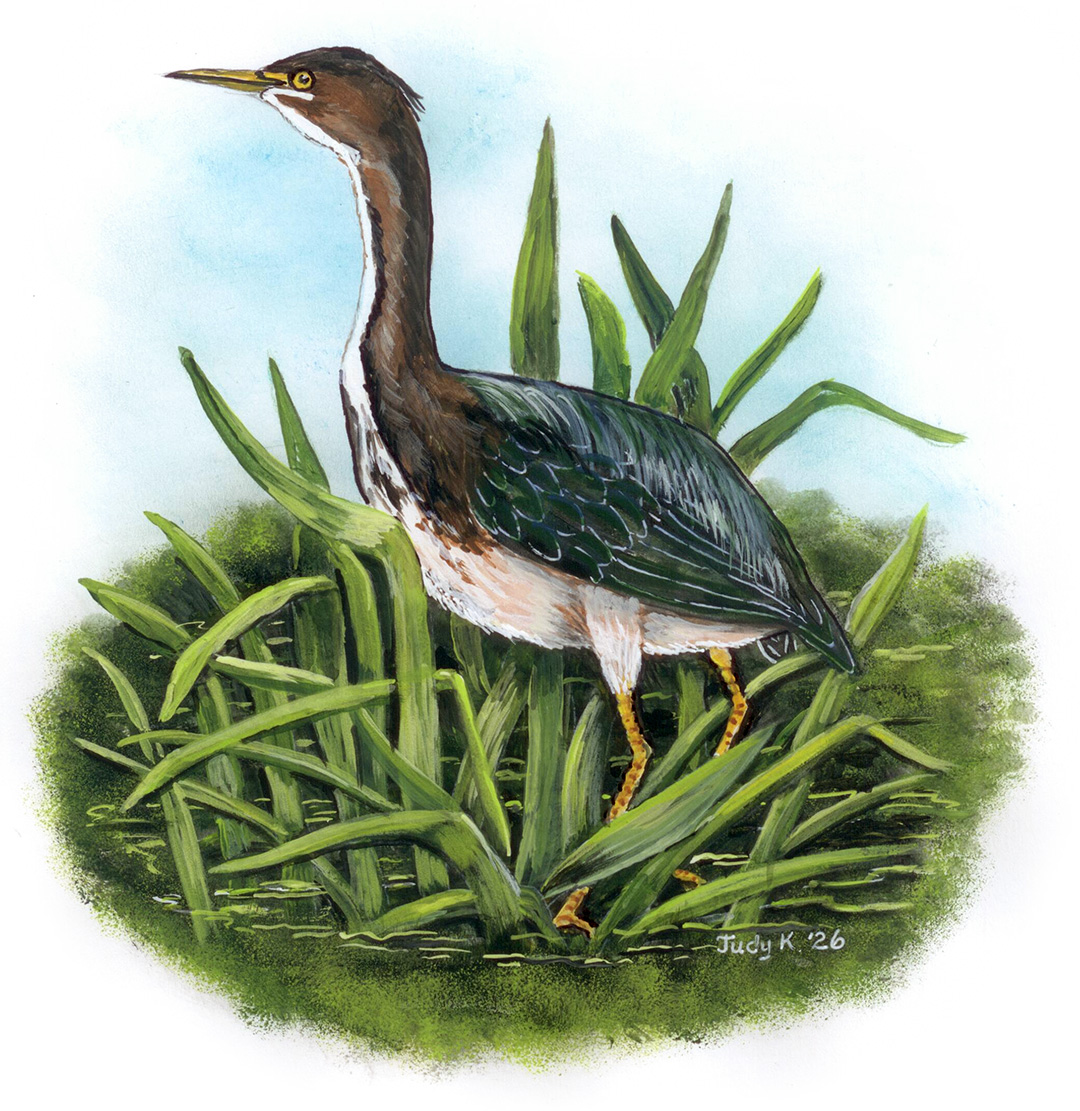
Sometimes painting subjects just come gliding by! I was sitting in an open porch of friends with my binoculars, a bird guide, and a little girl on her swing. Then this Green Heron swooped by, first perching on a steel fence post close to a green algae-covered pond. I had been told that it comes by sometimes, and here it came!
You will need:
- Soft-lead pencil colors
- Regular paper
- White cardstock
- Pencil
- Fine-tip black marker
- Foam sheet
- Acrylic paints
- Colors used: nutmeg brown, black, blue, dark blue, green, lime green, cream, yellow, golden yellow, white
- #20 fat brush
- #10/0 fine round brush
- #6 filbert flat shader
- Fingertip sponge dauber
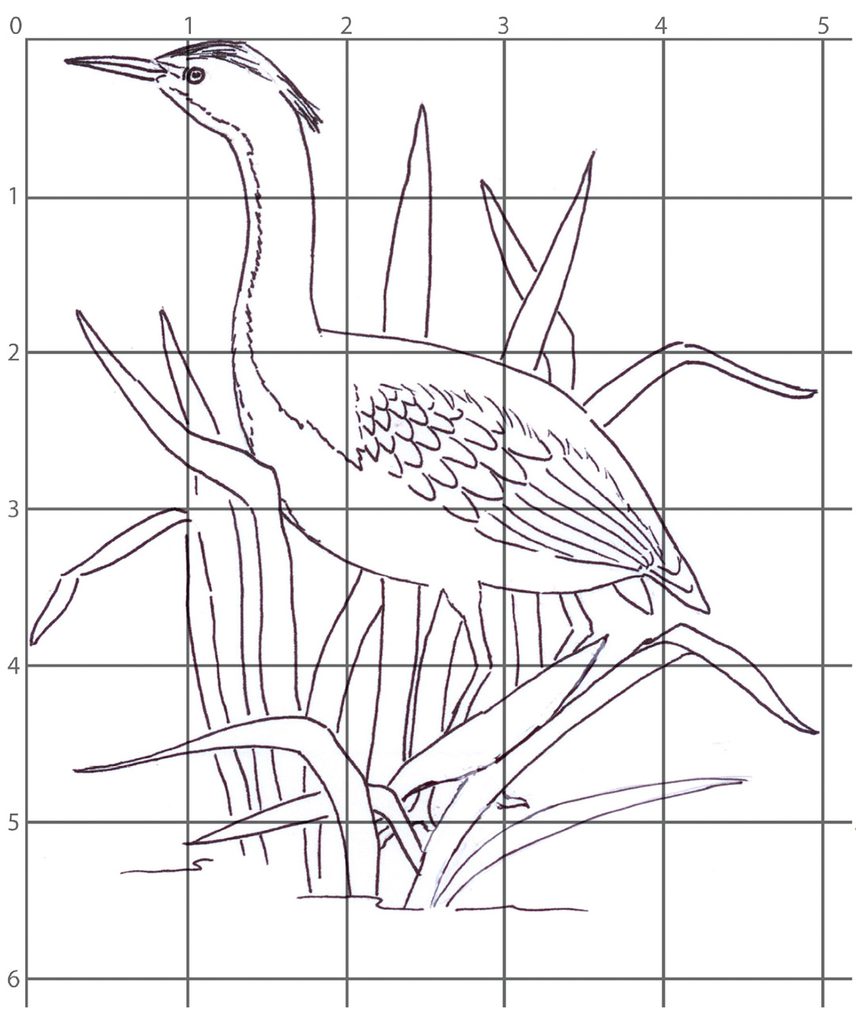
- Sketch your heron, block by block. Then draw in the rushes. Note that I didn’t draw as many as in the final picture. This gives you the freedom to add as many as you wish.
- Prepare your cardstock by brushing/dabbing the water area in a rough oval, using a mix of green and black. To finish up this oval, use a sponge dauber, going all around the outer edge of this oval with lime green. This provides a gentle edging to the background water area.
- If you have access to white carbon paper, transfer the heron’s body, legs, and rushes. This will leave white-line areas to paint. Or simply draw in body and rushes with a soft-lead pencil color. The head, neck, back, and the rushes sticking out of the top can be traced by a window.
- With a #20 brush, brush in the sky with blue chalking, trying to avoid the heron’s neck and head. Try to get the blue dark enough to have the white underside edging of the neck stand out.
- The heron’s neck and some of the upper body uses a mix of brown and black. The rest is a mix of green and black. Do the belly and underside of head and neck with cream or white. (You may need to double-coat the belly to cover up the black/green background.) Wing divisions can be done with a white gel pen or your finest 10/0 brush. Do a small mix of dark blue and cream. With your filbert brush, pull this down over the back. Also pull down a thinned bit of green. Note the yellow eyes, bill, and legs. Use yellow and golden yellow for this.
- Now paint the rushes, using your #6 filbert brush. Since the background is mostly black, you will use green, but with much more lime green with cream. Dip one side of your brush in lime green and the other in cream. Then sweep along the edges, and more as needed to achieve lighter rushes and highlights. (This technique applies to many aspects of painting.)
In a freehand mode, brush in more rushes, naturalizing your setting. And finally, do small ripple lines to make sure it looks like water!
If you feel intimidated with paints, you can also do this scene with soft-lead pencil colors. Eliminate the black pond area and do just the rushes. You will still be creating a lovely scene. Simply try to match painting colors with soft-lead pencil colors.