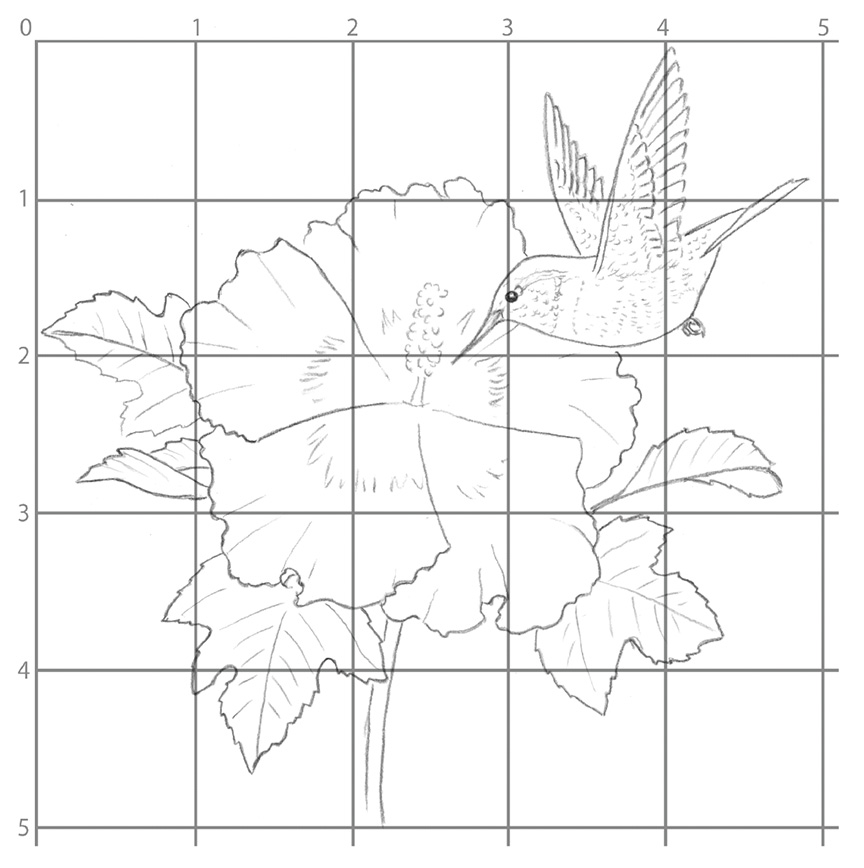
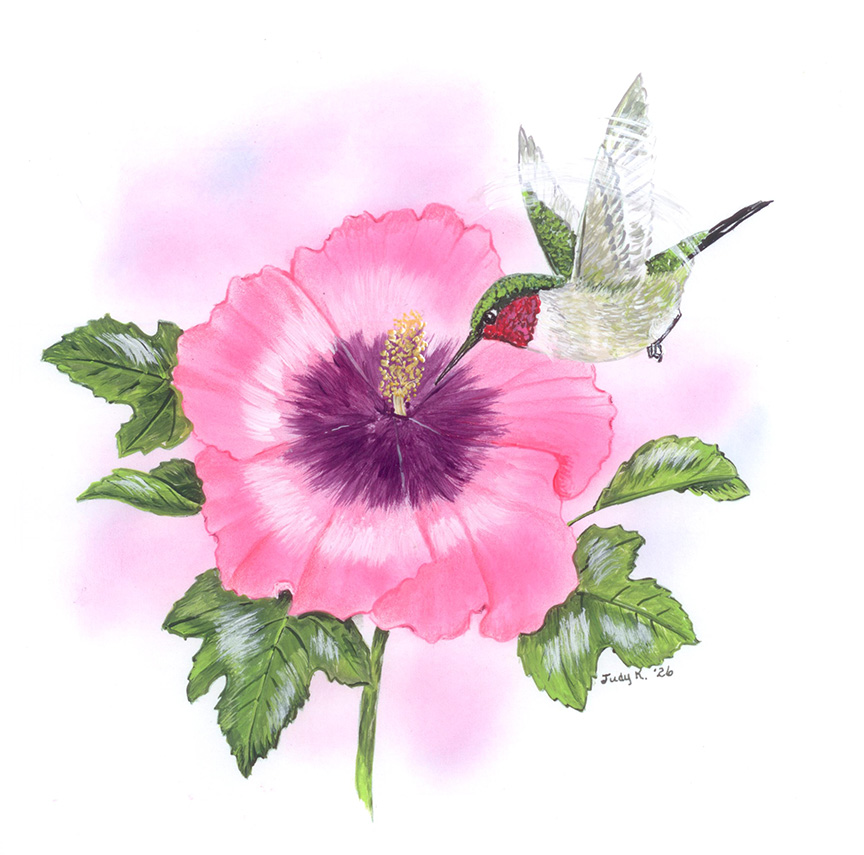
On regular paper, lightly mark 1” squares. Now lightly again, block by block, sketch in your hummingbird scene. When you feel satisfied, trace over your drawing with a fine-tip black marker. Now trace this onto white cardstock paper using a rose pencil for the flower, dark green for leaves, and gray, red, and green for the hummer. (The picture will show you what colors to use.)
Carefully do the eye first with your fine-tip black marker. Continue with the bird. I used paint: dark green and lime green dabs for the head and right wing and the upper side of the tail. The wings are gray with a smidgen of lime green. The body is a mix of gray and lime green. Using your tiniest brush, 10/0, dab in tiny white feather markings. For the gorget, use red and black (dab more red than black) with a highlight of rose. Do your best to make this gorget glint! Add a tiny black streak to separate the green and red. A sharp black completes the tail and tiny claws. Do this with a black pen if you wish. Now…have those wings beating at 55 wingbeats a second! You can only give the sense by swishing a bit of white paint over the wings as this picture shows.
With an underhand grip and a foam sheet underneath, outline the flower and petal divisions with a rose pencil color. With sweeping motions, sweep upward to color the petals. Here and there, add a few extra dark marks on the outer rim to further distinguish petals. To blend in a uniform pink, I brushed pink stamping ink over the existing pencil color pink, using a #20 brush. Decorating chalks would also work.
With dark purple paint, brush outward from the center as shown. (Experiment on other paper to see if your brush will do a good job.) Do the stem and stamen with dabs of a golden yellow and white mix. Next brush in white highlights as shown on your guide picture.
The leaves have already received their pencil color green border. Now continue on with pencil color or paint. I used dark green and lime green paint, brushing outward in the direction of the veins. With a 10/0 brush or a sharp pencil color, draw in the veins. With quick brushings, add the white highlights that make your leaves shine with vibrancy.
The final touch… With a #20 fat brush, add the background haze with pink and a bit of blue.