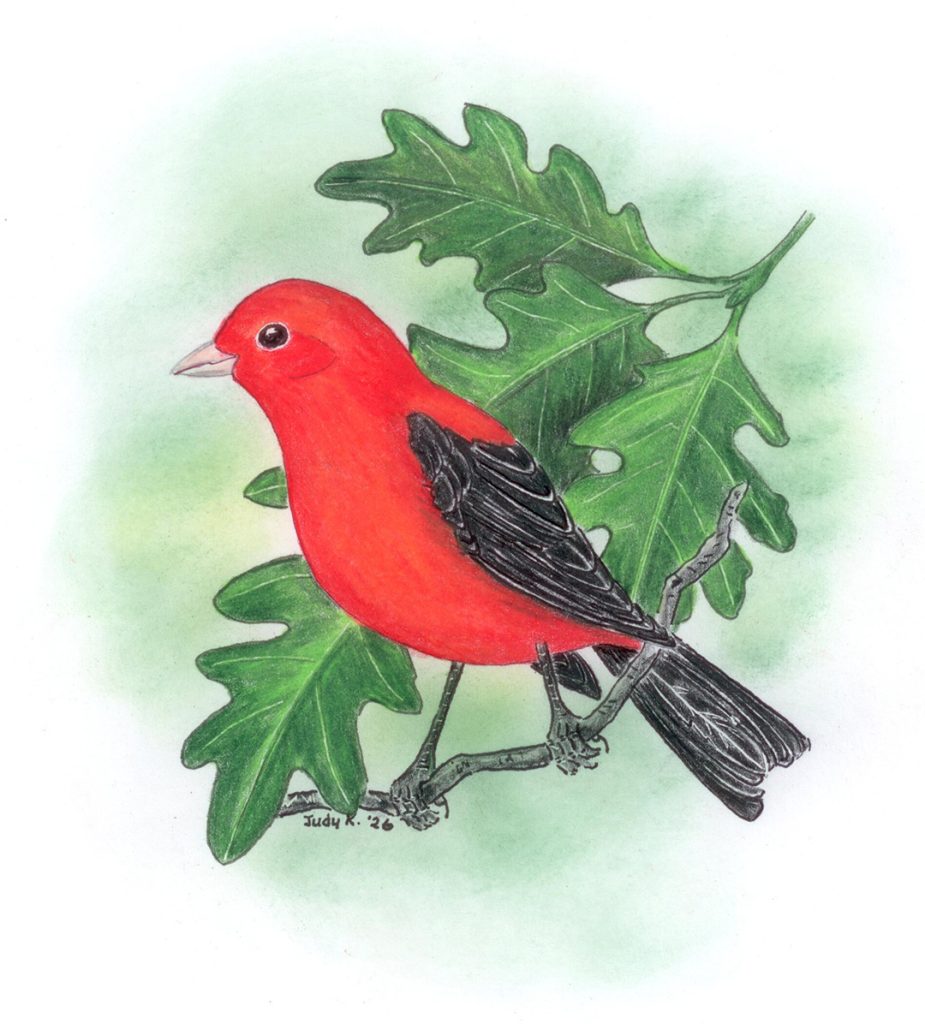
This delightful bird is even brighter in a gleaming, vibrant red than the cardinal. This one is in a white oak, its desired habitat. He arrives each year from his winter stay in the Andes just as buds erupt into bloom.
You will need:
- Sketch paper
- White cardstock
- Pencil
- Soft-lead pencil colors
- Pencil colors used: Red, Spring green, Orange, Dark green, Black, Gray, Light peach
- Fine-tip black marker
- Fine-tip stylus tool
- Foam sheet
- Acrylic paints
- #20 fat brush
- #10/0 fine round brush
- Dk. green and dk. red micron pens, (opt.)
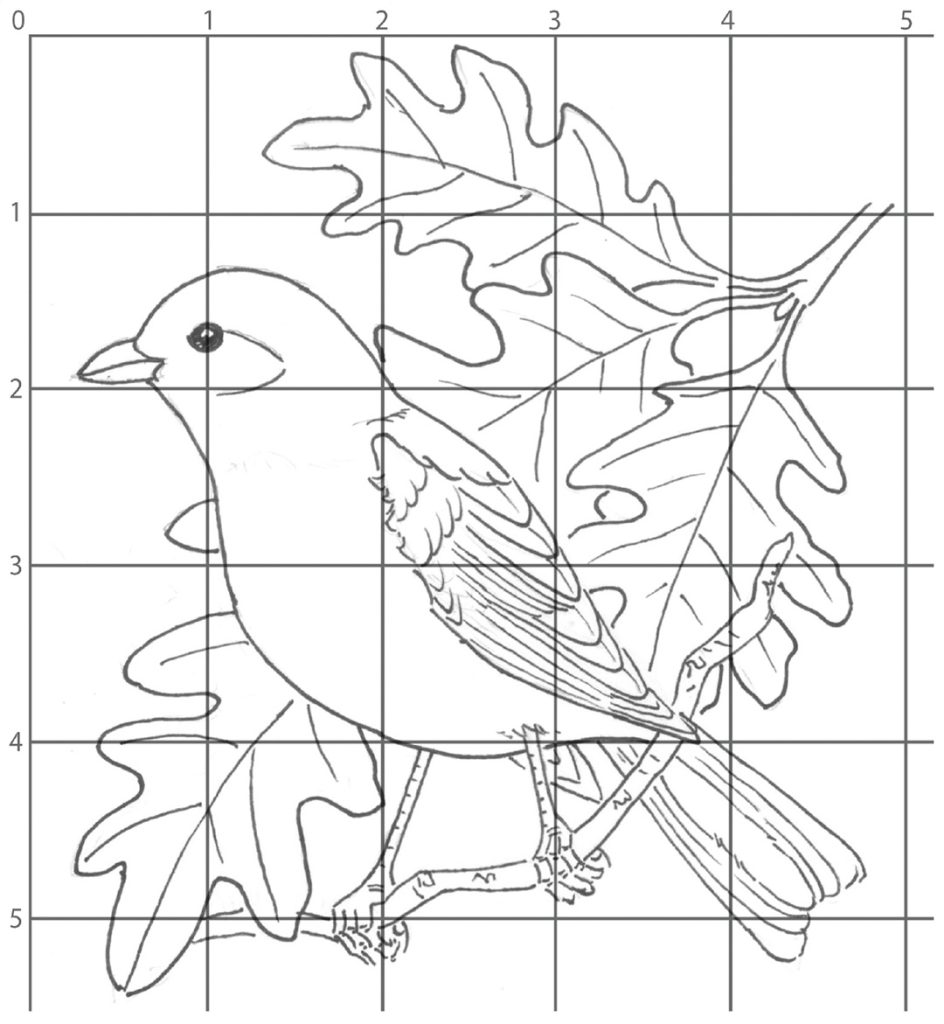
- On regular paper, lightly mark 1” squares. Lightly again, sketch your tanager block by block. When you are satisfied, trace over your drawing with a black fine-tip marker. Now trace this onto cardstock, using black for the wings, feet, tail, and branch. Outline the bird with red and the leaves with green. If you wish, use fine-tip micron pens for the outlining.
- Carefully do the eye first with your black fine-tip marker. Outline feather divisions with black; then outline again, beside the black, using a fine-tip stylus tool. Then use the same principle for the veins on the leaves, and the fine markings on the legs.
- Now you are ready to add color. The leaves are a blend of dark green, spring green, and some black. (Study your guide picture to place black areas.) Watch the veins pop out! Burnish the entire leaf with spring green until you see complete, vivid coverage.
- Continue on to the bird’s wings, tail, and legs. Again, watch those divisions pop out. Add more black between each division. With less pressure, do the legs and branch.
- What makes this bird a Scarlet Tanager? Of course, the vivid red does. Do this gradually, building up until it covers evenly. Then burnish with orange. The bill is cream with a tiny bit of regular lead pencil shading.
- Now finish up your drawing with a green and yellow background haze. Do the yellow first, then green, with a #20 fat splayed brush. This haze gives recognition that this bird is in the woods. Always remember to do the first sweepings on scrap paper to avoid ugly streaks.
All done? Is your scene bright and beautiful? Good job!